This article describes the construction of a launch pad for the water rocket, for which you can also find the building instructions here on Youngstarswiki.
WARNING
One more note before we start:
ATTENTION: this rocket can fly up to 40m high and has a real force when it hits the ground, so be careful where you launch it! In addition, depending on the accuracy of the construction and the wind, the rocket does not always fly straight up, but can also land a good 40, 50... meters away. Make sure that there are no objects or people in the vicinity that could be damaged by the rocket. All liability remains with the operator of the water rocket.
Material
Gardena hose coupling / piece of garden hose / hose clamps / car tire valve / cable ties / cord / housing made of wood, metal, plastic,... / bicycle pump for Schrader valve
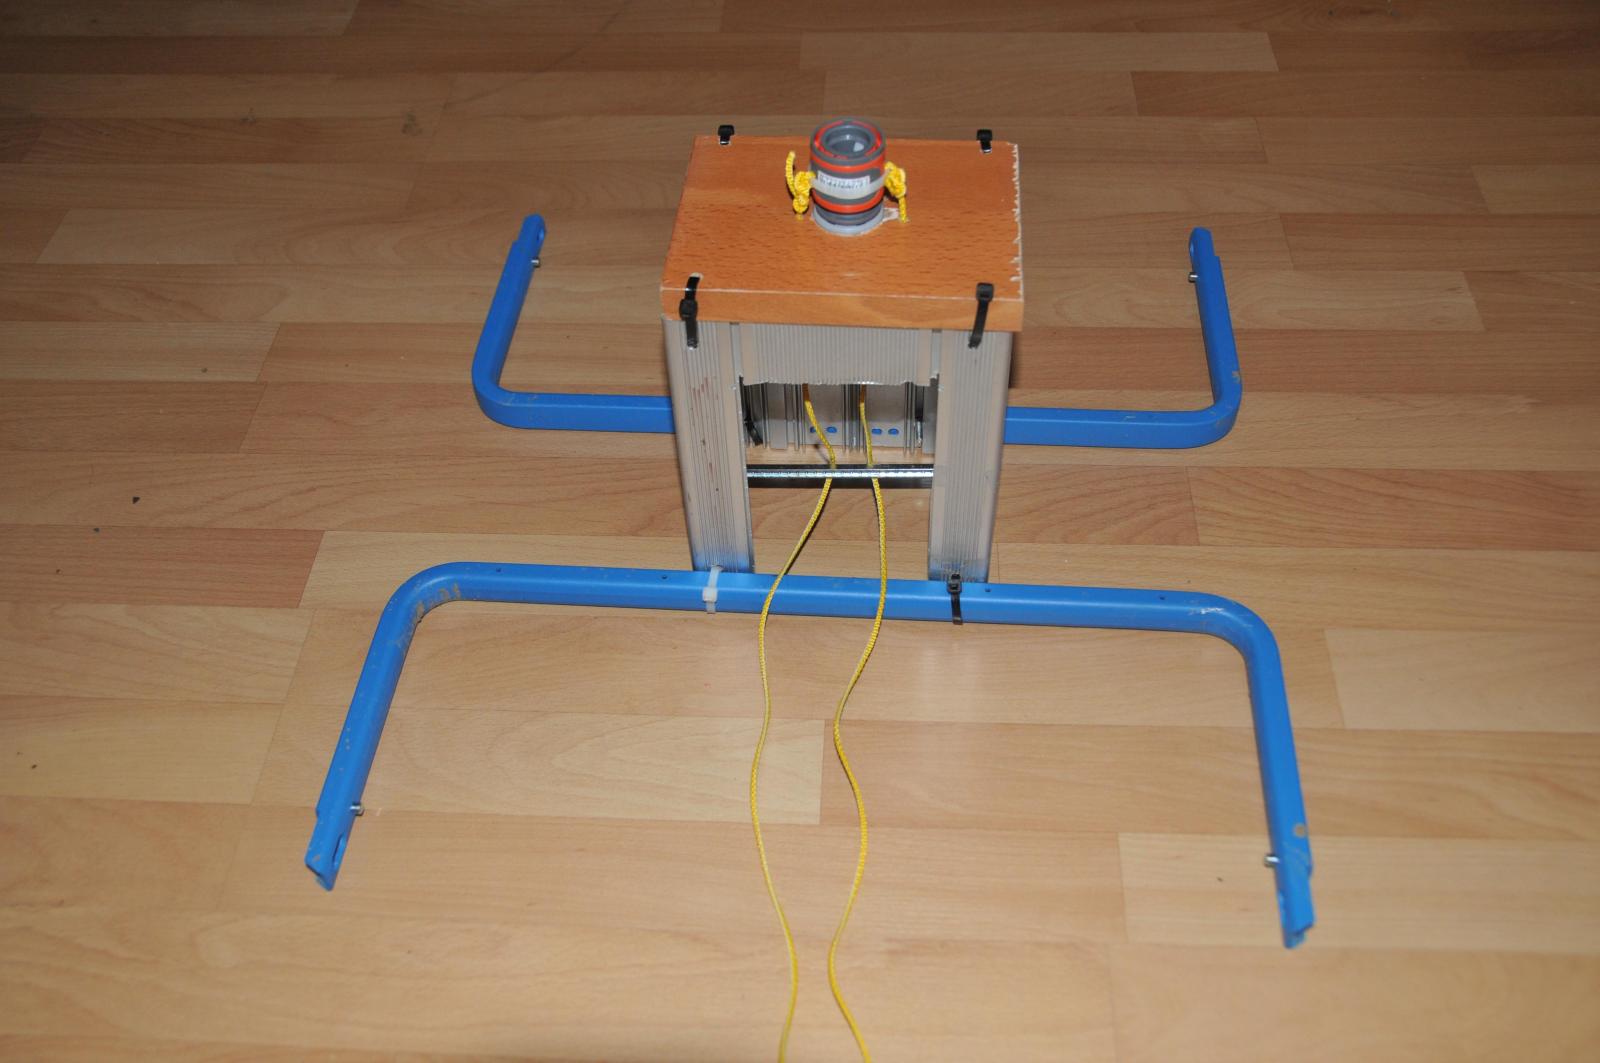
The housing shown here is assembled from the metal housing of an old device, its metal bracket, an old laminated wood panel and cable ties. It is intended as an example of how to build a launch ramp at virtually no cost.
Note: the bicycle pump used should have a pressure gauge, but should not be of the most expensive brand, as a little water will inevitably get into the pump hose when pumping up the pressure and this can damage the pump in the long term.
First step
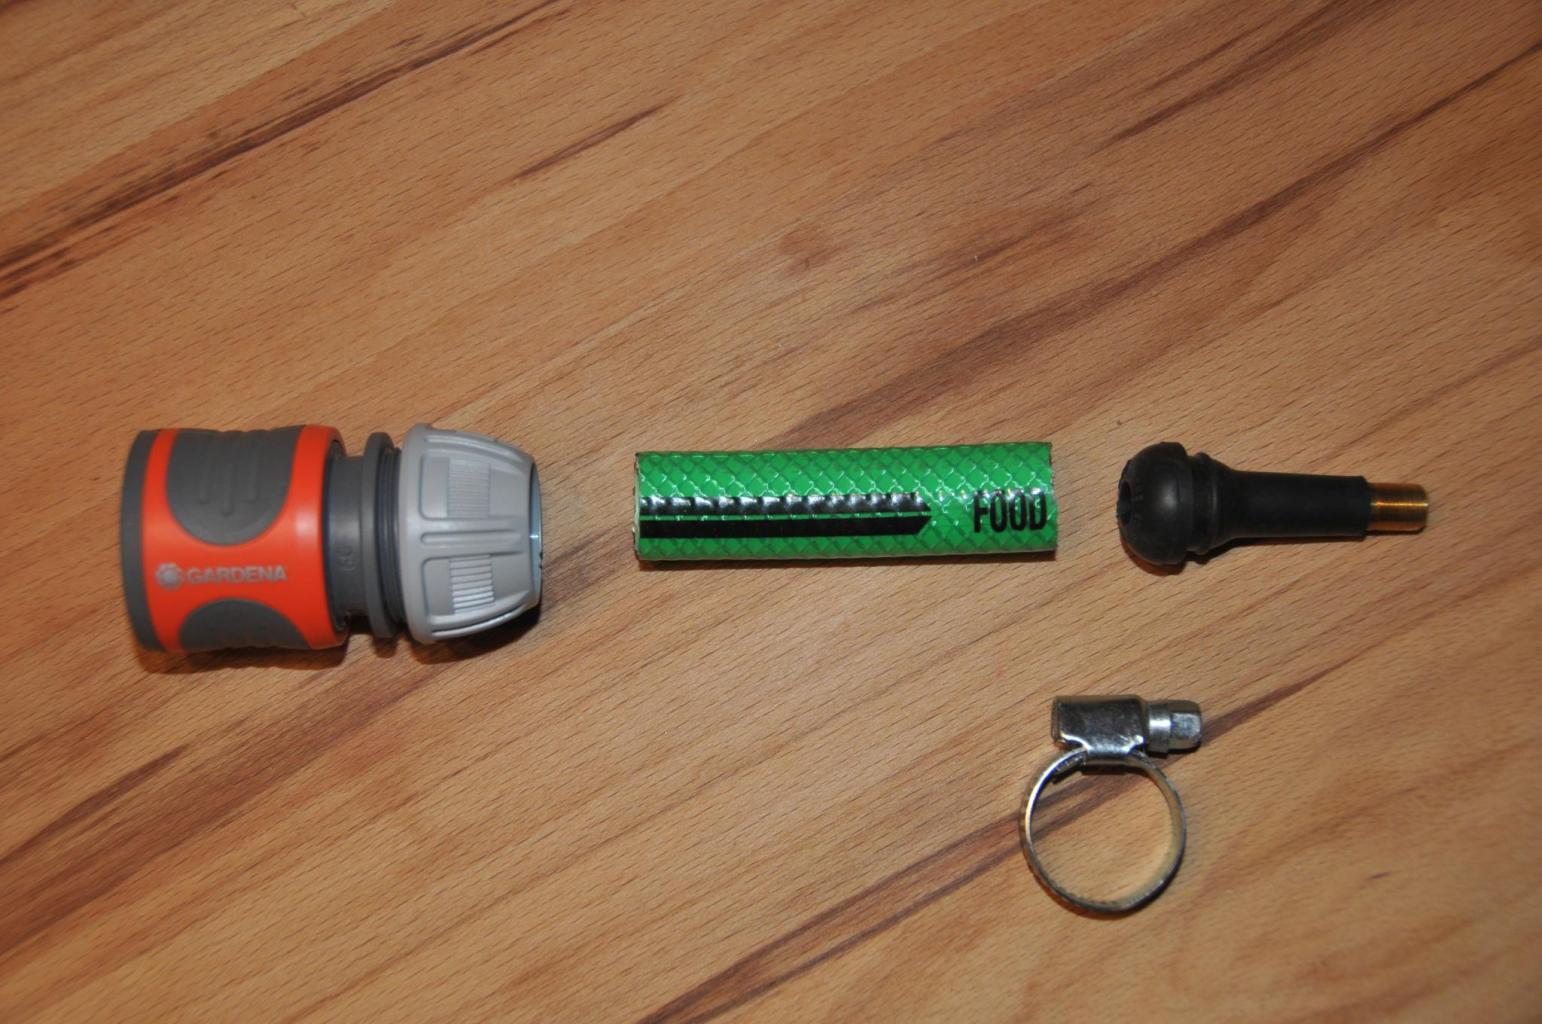
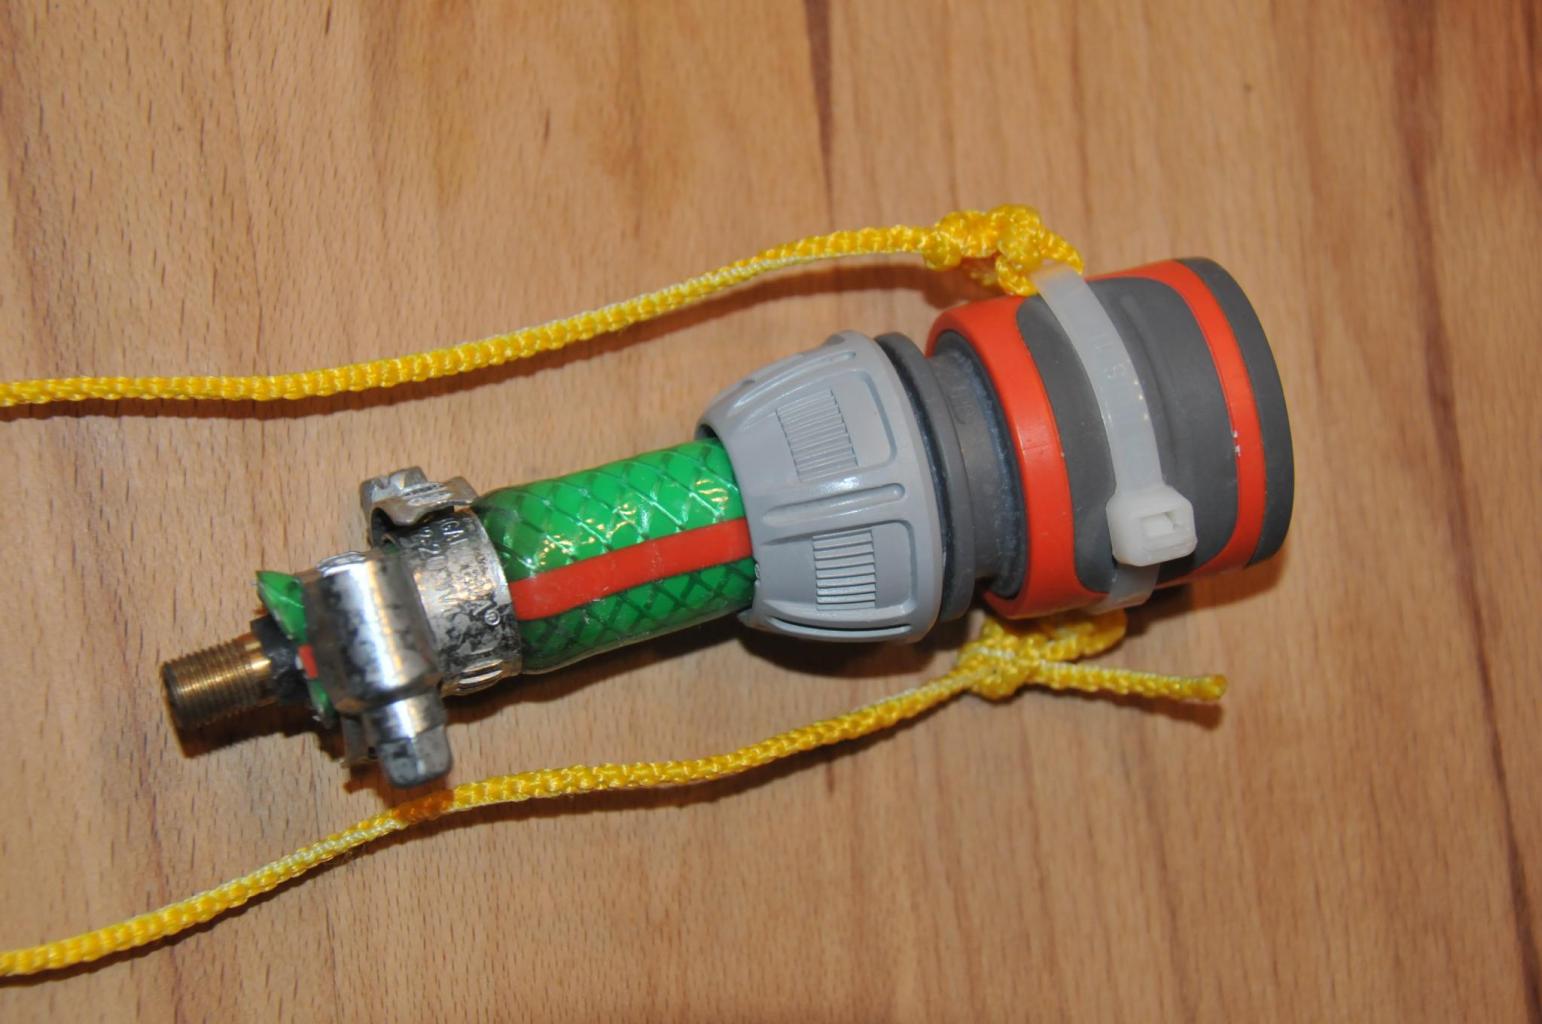
The bead of the car valve is machined until it fits snugly into the piece of garden hose. The valve is pushed so far into the hose that only the metal part is sticking out and the valve is now secured in the hose with two hose clamps. The other end of the hose is pushed into the Gardena hose coupling and secured. A cord is now attached to the neck of the hose coupling with the cable tie on the left and right. These should be several meters long.
Second step

A hole the size of the lower part of the Gardena hose coupling is drilled into the top of the wooden, metal or plastic housing. The lower part of the coupling (light gray in the picture) must fit snugly into the hole without hindering the movement of the upper part. Two smaller holes are drilled to the left and right of the hole to feed the cord through.
Third step

An opening is made on the side of the housing where the cord can be fed out and the bicycle pump hose fed in. In addition, a rod is inserted inside the housing to deflect the cord
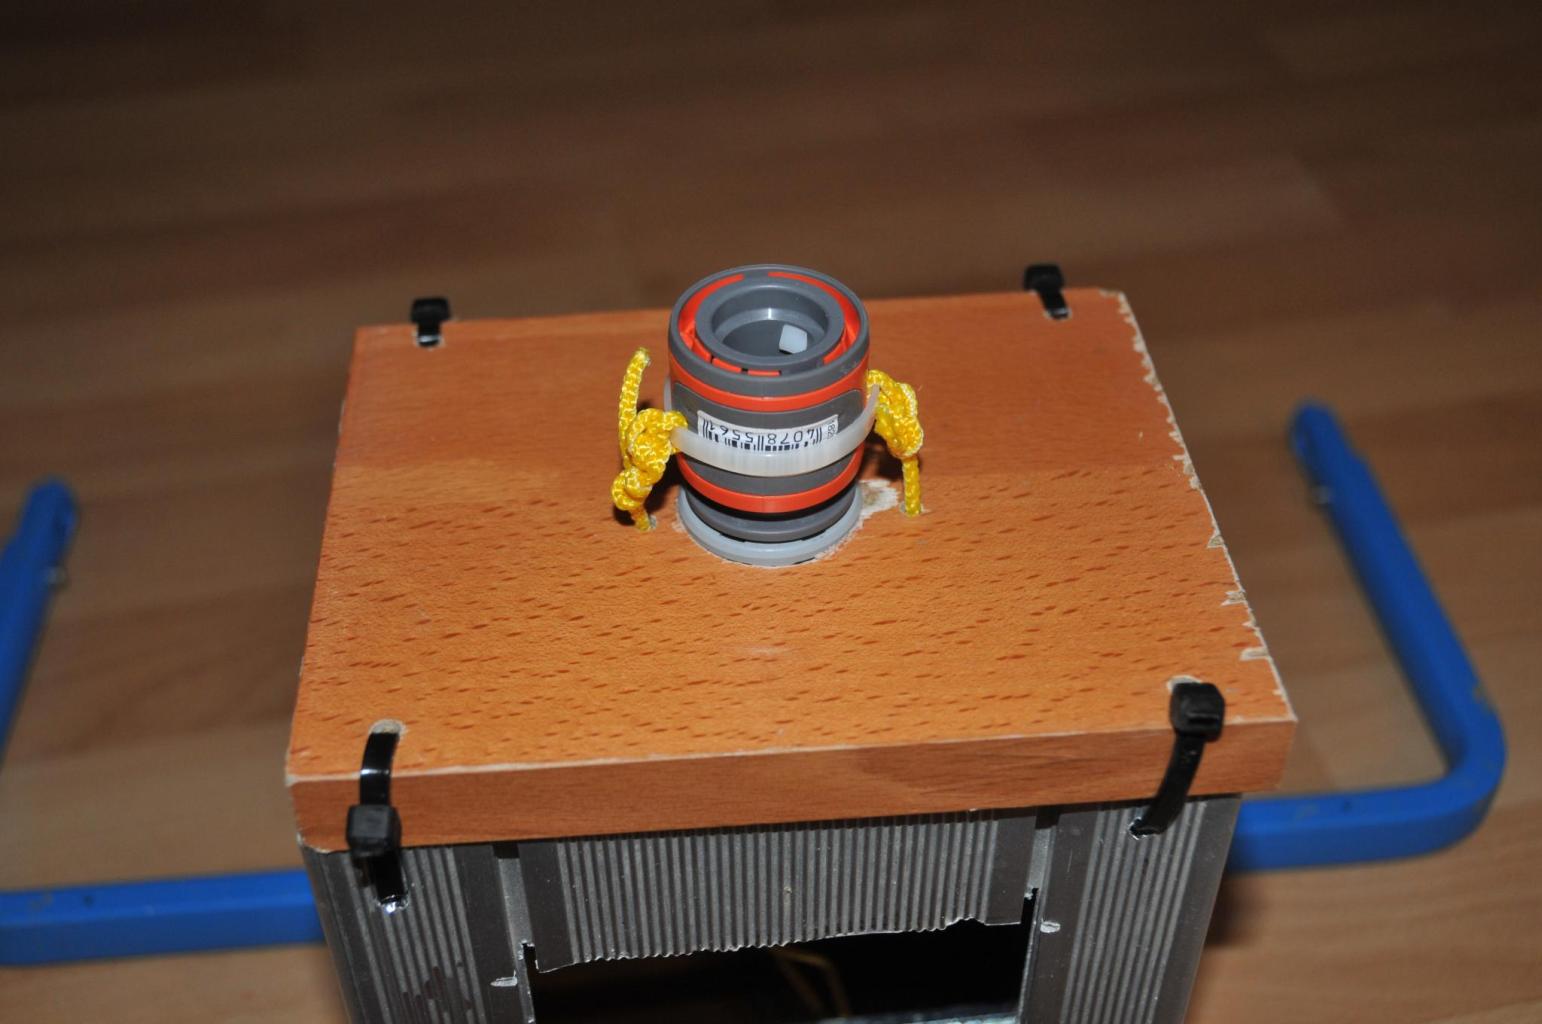
The cord is now threaded through the two smaller holes and the hose coupling module is inserted into the hole and pressed tight. It has proven useful not to glue this module so that it can always be removed for repair purposes.
Fifth step
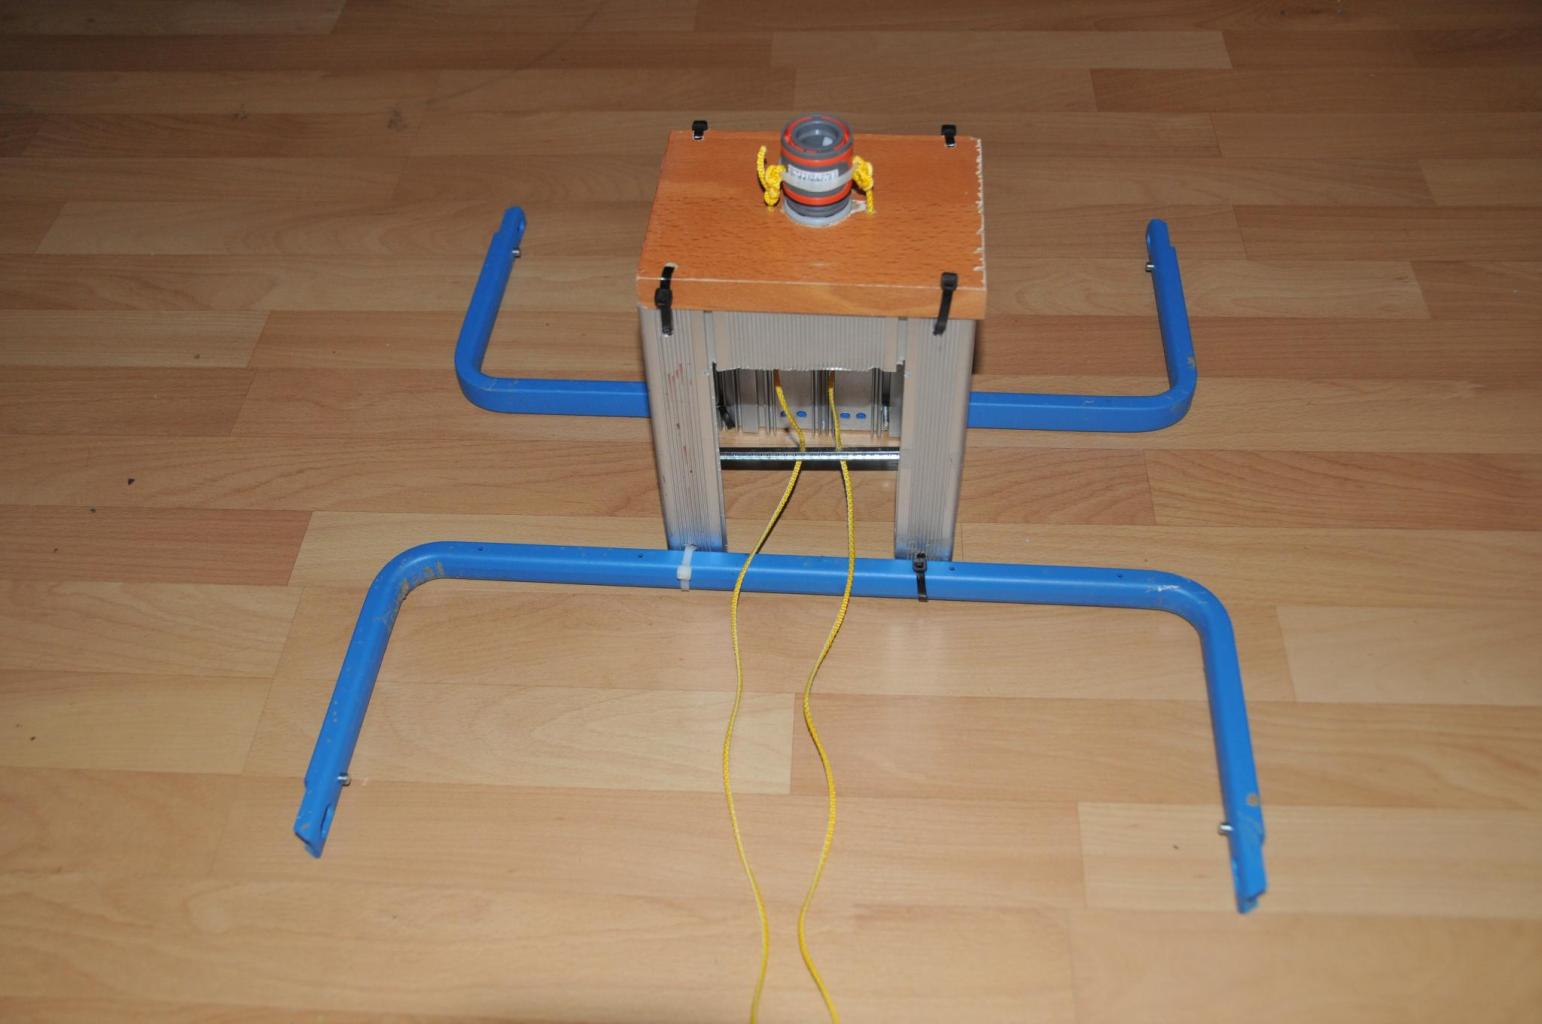
The final step is to attach brackets to the housing so that the launch pad can be fixed to the ground with tent pegs and won't tip over. I used the metal brackets from an old appliance for this. This construction won't win any beauty awards, but it does the job ;)
Now the launching ramp is ready and can be tested dry: when it is fixed to the ground with tent pegs and then pulled on the cord, the Gardena valve should open.
Rocket launch
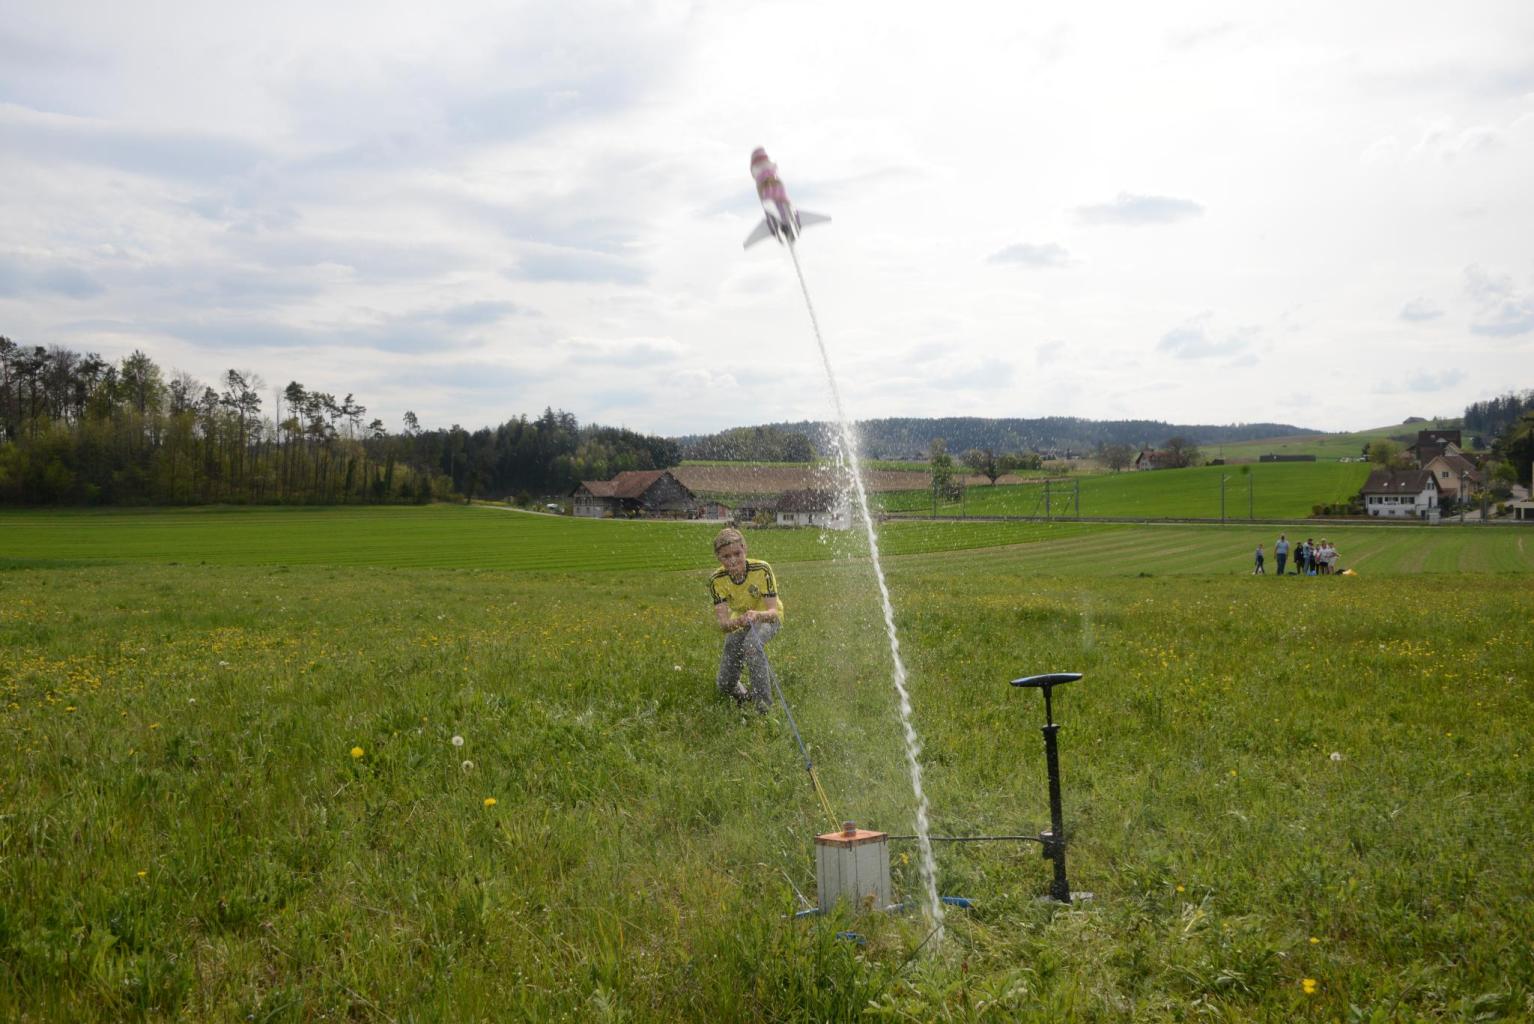
For the rocket launch, the launch pad is now placed and secured on a suitable area. The bicycle pump is connected to the car valve and the rocket is filled with water to a third of the bottle volume. The bottle is then placed on the launch pad with a quick tilting movement, if possible without losing any water.
The bottle can now be pressurized using the pump. With undamaged bottles, a pressure of 4 bar is possible, I have also operated rockets with 5 bar, but this, like the entire operation of the launch pad and rocket, is at your own risk.
Now the big moment has arrived and the rocket owner can launch the rocket with a firm pull on the string. The flight of the rocket should now be observed and, if necessary, the landing of the rocket should be avoided. As the rocket does not have a parachute, it is advisable to have adhesive tape with you to repair any landing damage on the spot so that the next launch can start straight away!
Have fun!
Content may be automatically translated. Help improve the quality of the translation with your editing!


Comments
Wasserrakete
Link zu Wasserrakete: https://www.youngstarswiki.org/index.php/de/wiki/art/wasserrakete